





Chiller Sizing: How to Size a Chiller for Injection Molding

Chiller Sizing: How to Size a Chiller for Injection Molding
The most expensive chiller mistake I see isn’t a breakdown. It’s buying the wrong size. I’ve watched a molder spend six figures on a unit so oversized it short-cycles and ices up its own evaporator. I’ve also seen a plant try to run twelve presses off a chiller sized for eight, then wonder why parts warp all summer.
Chiller sizing isn’t guesswork, and it isn’t “bigger is safer.” It’s a calculation — and once you know the inputs, you can do it in about ten minutes. This guide walks through how to size a chiller for injection molding the way I’d do it on a real shop floor, with the formula, a worked example, and the mistakes that quietly cost you money.
Why Chiller Sizing Matters More Than Chiller Brand
An undersized chiller can’t remove heat fast enough, so your mold temperature drifts, cycle times stretch, and parts come out with warping, sink marks, and inconsistent dimensions. An oversized chiller is the sneakier problem:
- Short cycling — the compressor starts and stops constantly, wearing out the most expensive part of the machine
- Poor temperature control — an oversized unit has less precise control at low load, so your “stable” mold temperature actually wanders
- Higher energy and cost — you paid for capacity you never use, and you keep paying to run it
Getting chiller sizing right means a unit that matches your actual cooling load — no more, no less.
The Core Formula: Cooling Load in Three Inputs
Every chiller sizing calculation comes down to the same three inputs:
- Flow rate — how much water (or glycol) moves through your cooling circuit, in gallons per minute (GPM) or liters per minute
- Temperature difference (ΔT) — how much the water warms up as it passes through the mold, in °F or °C
- Specific heat of the fluid — a constant for water, adjusted if you use glycol
The standard formula for cooling capacity is:
Cooling load (BTU/hr) = 500 × Flow rate (GPM) × ΔT (°F)
That 500 is a constant for water (8.33 lb/gal × 60 min/hr × 1 BTU/lb·°F). For metric, the same idea gives:
Cooling load (kW) = 4.19 × Flow (L/min) × ΔT (°C) ÷ 60
Then convert to refrigeration tons, since that’s how chillers are rated:
Tons = BTU/hr ÷ 12,000
This is the chiller tonnage calculation every sizing exercise ends with — your total cooling load in BTU/hr, divided by 12,000, gives the tonnage you need to shop for.
How to Size a Chiller for Injection Molding: Step by Step
Here’s how I’d work through it for a real plant.
Step 1 — Calculate the cooling load per press
For each machine, you need the flow rate through its mold circuits and the temperature rise across them. If you don’t have a flow meter, start from the pump and circuit design, or measure the return temperature versus supply temperature once running.
Step 2 — Add up all the presses
Total load is the sum of every machine that shares the chiller. Don’t forget auxiliary loads: hydraulic oil coolers, feed-throat cooling, and any downstream cooling on robots or conveyors.
Step 3 — Apply a safety factor
Real plants rarely match the spreadsheet. Add a margin — typically 10–20% — for fouling, ambient heat gain, and future capacity. That’s not “buy 3× bigger”; it’s a sensible buffer.
Step 4 — Match the chiller’s rated capacity at your conditions
This is where most people trip. A chiller’s tonnage is rated at specific conditions (usually 44°F leaving water, 95°F ambient for air-cooled). If you need colder water or you’re in a hot plant, the actual capacity drops. Always check the manufacturer’s capacity table at your leaving water temperature and ambient — not just the headline number.
Step 5 — Decide the architecture
One big central chiller, or several smaller units? That’s a strategy decision with its own trade-offs, covered in our guide to central chiller plants.
Worked Example: Sizing a Chiller for Ten Presses
Say you run ten injection molding machines. Each mold circuit flows 4 GPM with a 5°F temperature rise.
| Step | Calculation | Result |
|---|---|---|
| Per press load | 500 × 4 GPM × 5°F | 10,000 BTU/hr |
| Ten presses | 10,000 × 10 | 100,000 BTU/hr |
| Convert to tons | 100,000 ÷ 12,000 | 8.3 tons |
| Add 15% safety factor | 8.3 × 1.15 | ~9.5 tons |
So for this plant, a 10-ton chiller is the right ballpark — not a 20-ton unit “to be safe.” That difference in size is real money, both up front and every month on the power bill.
Air-Cooled or Water-Cooled? It Changes Your Sizing
The chiller type affects how much capacity you actually get in your building:
| Factor | Air-Cooled | Water-Cooled |
|---|---|---|
| Capacity at high ambient | Drops noticeably in hot rooms | Stable (depends on tower water) |
| Heat rejection | To the room — adds load to your HVAC | To a cooling tower |
| Best for | Smaller loads, no tower available | Larger loads, hot climates |
| Sizing impact | Oversize for summer peaks | More predictable year-round |
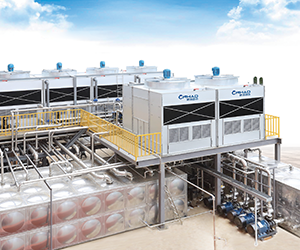
An air-cooled chiller that hits its rated tons at 95°F may deliver only a fraction of that on a 110°F day. If your plant runs hot, size accordingly — or look at a water-cooled system instead. If you use a tower, its own sizing ties directly into your chiller, which we cover in the cooling tower guide.
The Five Sizing Mistakes That Cost You Money
- Sizing to the machine’s nameplate, not the mold. The mold’s cooling demand — not the press tonnage — sets the load.
- Forgetting the safety factor and future presses. Add a buffer, but keep it honest (10–20%).
- Ignoring temperature and ambient de-rating. Rated tons aren’t delivered tons in a hot plant or at low leaving-water temperatures.
- Overlooking auxiliary loads. Oil coolers and feed-throat cooling add up.
- Confusing “more water” with “more cooling.” Flow alone isn’t capacity — it’s flow times ΔT. Pushing too much flow can also cause turbulent-vs-laminar problems inside the mold.
Why Mold Temperature Control and Chiller Sizing Go Together
A chiller feeds the mold, but what actually holds the mold at temperature is the regulador de temperatura del molde. Get the chiller sizing wrong and the controller is fighting a losing battle — it can trim small deviations, but it can’t compensate for a supply that’s too warm or too unstable. If you’re precision molding, the tighter your temperature window, the more the chiller sizing matters; that’s why precision molding demands low-temperature chilled water.
On fully automated lines this is even more critical — a chiller that drifts will undermine the consistency an automated injection molding line depends on.
Frequently Asked Questions About Chiller Sizing
How many tons of cooling do I need per injection molding machine?
There’s no fixed number per machine — it depends on the mold’s flow rate and temperature rise. Calculate each mold’s load with the formula (500 × GPM × ΔT), sum them, then add 10–20%. As a rough sanity check, small machines often land in the 1–3 ton range and larger ones higher, but always calculate rather than guess.
What is a refrigeration ton?
One refrigeration ton = 12,000 BTU/hr, the heat needed to melt one ton of ice in 24 hours. Chillers are rated in tons, so you convert your BTU/hr load by dividing by 12,000.
Can I oversize a chiller for future growth?
Only moderately. A 10–20% buffer is sensible; a chiller double your actual load will short-cycle, control temperature poorly, and waste energy. If you expect major growth, consider multiple smaller chillers you can bring online as needed instead of one huge unit.
Why does my chiller’s real capacity seem lower than its rating?
Because ratings are stated at specific conditions — typically 44°F leaving water and 95°F ambient for air-cooled units. Higher ambient, lower leaving-water temperature, fouled heat exchangers, or glycol instead of water all reduce delivered capacity. Always size against the manufacturer’s capacity table at your actual conditions.
Does a bigger chiller make my mold cooler?
No — a bigger chiller doesn’t lower mold temperature by itself. Mold temperature is set by your temperature controller and the flow through the mold. The chiller’s job is to supply enough cool water at a stable temperature to let the controller do its job. Oversizing doesn’t make parts cooler; it just wastes capacity.
Bottom Line
Chiller sizing for injection molding comes down to three inputs — flow, temperature difference, and fluid — plus a sensible safety factor, matched against the chiller’s capacity at your real conditions. Do the calculation, check the de-rating, and pick the architecture that fits your plant. Get it right and your chiller quietly does its job for years. Get it wrong and you’ll be paying for it — in scrap, in energy, or in a machine that never quite holds temperature.
If you’re specifying cooling for a new line or replacing an undersized unit, our guides on central chillers, cooling towers, y temperature control units will help you map the whole system.